That familiar yellow storage barn behind the Saline Railroad Depot is another often photographed local icon. Easily visible across East Bennett Street from Henne Field, it’s often used to serve as a symbol of Saline.
At the same time, it can be a challenging subject in composition. Although certainly free of obstructions for its south face, because of the site layout, most camera positions end up producing a Keystone Effect, which is particularly unflattering for older, well preserved structures. This edifice in particular looks better when photographed from higher vantage points. [1]
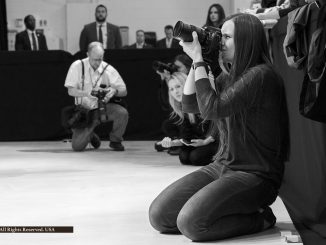
One way to accomplish this is by mounting your camera to a monopod and using that to get that setup higher above your head. The two necessities that go with this are the ability to lock focus on a preset point and an ability to trigger the shot without your finger on the camera. [2,3]
Although photographers routinely utilize this technique, maintaining balance with DSLR or mirrorless equipment mounted at the end of a shaft extended potentially several feet above one’s head can be challenging. Stability is significantly reduced. In physics it’s called an “inverted pendulum,” which is “really unstable.” Treat any such apparatus with extreme respect — for the safety of those around you, for your own safety, and for the safety of your camera. [4]
Additionally, since this approach is significantly less stable, the “1/focal length” rule-of-thumb for setting minimum shutter speed is not sufficient. Plan on 1/250-second or faster. [5]
Using a self-timer to make a photograph like this has an obvious disadvantage of needing to bring the camera down between each shot if you’re going to make multiple takes (highly recommended). Another option to consider, if available, is a built-in intervalometer. Some cameras have ports that provide for the attachment of remote triggers, thus providing yet another way of accomplishing this end. [6,7]
Finally, manually pre-set focus before hoisting camera to desired position, lens stopped down to an aperture of f/8 or more.
Some cameras have associated apps through which they can interface in more or less real-time with smartphones. Depending on the software, this can let you see live images from the monopod-elevated camera, trip the shutter, review images, and even adjust exposure settings.
Can this photograph be accomplished using a smartphone itself on a selfie-stick? In many cases it can, subject to an operating system, perhaps supplemented by apps, allowing user control in setting the key functions noted above.
If you decide to give this a try, share your results on Instagram using the #SalineDepot hashtag.
References
Photographed on February 25, 2016 at 10:37am using Leica Q camera with 28mm Summilux f/1.7 lens, set to f/8 at 1/3200-second and ISO 400 (hand-held monopod-mount).
- “How to Avoid Converging Verticals” Zoltan Arva-Toth (March 31, 2009) Photography Blog.
- “Monopods” B&H Photo Video.
- “Monopod Trick for Elevated Monopod Shots” Joe Edelman (December 17, 2013) YouTube.
- “How Long Can You Balance a Pencil?” Minute Physics (August 20, 2014) YouTube.
- “Minimum Shutter Speeds for Handheld Shooting: The definitive answer to ‘How slow can you go’” Jim Harmer, Improve Photography.
- “List of Large Sensor Cameras with Built In Intervalometers” Ian Norman (May 2, 2014) Lonely Speck.
- “Camera Remote Controls” B&H Photo Video.
- “How To Use The New iOS 8 Manual Camera Controls” Kate Wesson (September 24, 2014) iPhone Photography School.